Quantcast
Channel: pfSense Setup HQ
Viewing all 260 articles
Browse latest View live

FTP Server Configuration with pfSense

$
0
0

FTP Server Issues

FTP serverFile Transfer Protocol (FTP) is a standard network protocol used to transfer files from one host to another host over a TCP-based network. The original specification for File Transfer Protocol was published as RFC 114 in 1971, and thus predates even TCP/IP. Thus it is a mature protocol, but since it predates the time when security was a paramount concern, it is problematic for several reasons:

  • Passwords are transferred in the clear.
  • The protocol demands the use of at least two TCP connections (control and data) on separate ports.
  • When a session is established, data is communicated via ports selected at random.

These points create security challenges that can potentially led to issues. The best option a security professional could choose is to abandon FTP entirely, and utlilize one of several alternate methods of file transfer:

  • Explicit FTPS is an extension to the FTP standard that allows clients to request that the FTP session be encrypted. This is done by sending the “AUTH TLS” command. The server has the option of allowing or denying connections that do not request TLS, and is specified to use different ports than plain FTP.
  • SFTP, the “SSH File Transfer Protocol”, uses Secure Shell (SSH) to transfer files. Unlike standard FTP, it encrypts both commands and data preventing passwords and sensitive information from being transmitted openly over the network.
  • FTP over SSH refers to the practice of tunneling a normal FTP session over an SSH connection. Because FTP uses multiple TCP connections, it is difficult to tunnel over SSH. Nevertheless, there are several software packages that are able to rewrite FTP control channel messages and automatically open new packet forwardings for FTP data channels.
  • SFTP and SCP, in which the entire conversation is protected by the SSH protocol.

FTP-Proxy

Regardless, in some situations you may have to deal with setting up an FTP server. The best solution in this case is to redirect FTP traffic to a proxy that was written for this purpose. The proxy will then interact with pfSense. The program, which originated in OpenBSD, is called ftp-proxy. In pfSense 2.0 and later, the FTP proxy is in-kernel. To confirm that the FTP proxy is running, navigate to System -> Advanced, and click on the “System Tunables” tab. The first variable on the list, “debug.pfftpproxy” will be set to 0 if the FTP proxy is enabled (set it to 1 to disable the proxy). Also note that the FTP proxy will only work on the primary WAN at this time. It will not fail over and it will not load balance.

There are a few other configuration tips that should be mentioned, especially if you utilize FTP-proxy:

  • If you have a restrictive rule set or are utilizing policy-based routing for multiple WANS, make sure you have permitted traffic to 127.0.0.1 / ports 8000-8030 (the default port for ftp-proxy is 8021). This rule should be on top of all other LAN rules that utilize policy-based routing.
  • If you are running Windows to access the FTP server, try turning off Windows Firewall if it is running.
  • If Snort is running, try disabling Snort, and if you are able to access the server when it is disabled, try upgrading to a more recent version of Snort.
  • Delete any existing FTP ort forwards or firewall rules and add new port forwarding and firewall rules for the destination port 21 and the destination private NAT IP address. For more information on port forwarding with NAT, see my earlier posting on NAT/port forwarding.

If these tips do not help, you probably should consider using one of the alternatives to FTP listed above. However, this may not always be an option in a corporate environment or if a client wants an FTP server. If so, the use of ftp-proxy under pfSense when setting up an FTP server should provide at least a modicum of security.


External Links:

File Transfer Protocol at Wikipedia

Howto Setup FTP Server Behind pfSense at doc.pfsense.org

The post FTP Server Configuration with pfSense appeared first on pfSense Setup HQ.

Traceroute Utility in pfSense

$
0
0

Traceroute Explained

Traceroute

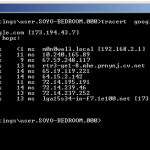
The traceroute command in action under Windows.

In computer networking, traceroute is a computer network diagnostic tool for displaying the route and measuring transit delays of packets across an Internet Protocol network. The history of the route is recorded as the round-trip times of the packets received from each successive host in the route; the sum of the mean times in each hop indicates the total time spent to establish the connection. Ping, on the other hand, only computes the final round trip time to the destination, not the intermediate times. It is defined in RFC 1393.

Traceroute sends a sequence of three ICMP echo request packets addressed to a destination host. The time-to-live (TTL) value, also known as hop limit, is used in determining the intermediate routers being traversed towards the destination. Routers decrement packets’ TTL value by one and discard packets whose TTL value has reached zero. When a packet is discarded because its TTL value reached zero, the router sends an ICMP Time Exceeded message back to the source. Traceroute, on the other hand, sends packets with gradually increasing TTL value, starting with a value of 1. The first router receive the packet, decrements the TTL value and drops the packet. The router sends an ICMP Time Exceeded message back to the source. When the source receives this ICMP message, it sends out a new set of packets with a TTL value of 2. This way, traceroute is able to build a list of routers that the packets traverse, until the destination is reached and returns and ICMP Echo Reply message. The timestamp values returned for each router along the path are the latency values, typically measured in milliseconds.

While traceroute under Windows (invoked with the tracert command) uses ICMP and the original specification called for using ICMP, the command did not initially work well because of the interpretation of RFC 791 (the Internet Protocol RFC) by routing equipment vendors. Thus to fix this, Van Jacobson wrote a variant to traceroute that worked so well and reliably, it was ported to many systems and used as the default. The Van Jacobson version used outbound UDP datagrams from the host running traceroute instead of ICMP. This was the default on any system using the Van Jacobson version of the command, including most BSD and UNIX-type systems. Systems using the Van Jacobsen version also use destination port numbers ranging from 33434 to 33534. The utility under Unix usually has an option to instead use ICMP echo request. If a network has a firewall and operates both Windows and Unix systems, both protocols must be enabled inbound through the firewall for traceroute to work and receive replies. Some traceroute utilities use TCP packets (e.g. tcptraceroute or layer four traceroute).

Using Traceroute in pfSense

Traceroute

Using traceroute in the pfSense web interface.

To use traceroute from the pfSense web interface, first browse to Diagnostics -> Traceroute. At “Host”, set the host to the IP address or hostname of the machine you are trying to trace. At “Maximum number of hops”, set a maximum number of hops for the trace to traverse. At “Use ICMP”, you can check this check box (if not, traceroute will use UDP). Then press the “Traceroute” button to perform the function. The output of the traceroute function will appear below the button.

Note that traceroute can sometimes take a long time to complete. You can click the browser’s stop button at any time to cancel the traceroute and display the results. It should be noted that multi-WAN is not supported by this utility.


External Links:

Traceroute at Wikipedia

How Traceroute Works at InetDaemon.com

Why traceroute sends UDP packets and not ICMP ones? from Stack Overflow

Traceroute at doc.pfsense.org

The post Traceroute Utility in pfSense appeared first on pfSense Setup HQ.

Video: PPPoE Server Configuration

webConfigurator Options in pfSense

$
0
0

Today, I thought it might be interesting to look at some of the advanced pfSense settings. I will start this series by looking at the webConfigurator settings, which you can find by navigating to System -> Advanced, and clicking on the “Admin Access” tab.

webConfigurator Options

webConfigurator

webConfigurator settings in pfSense 2.0

The first setting is “Protocol“. The default is HTTP, but you can choose HTTP Secure, which runs HTTP on top of the SSL/TLS protocol, enabling secure communications. Next is “TCP port“; here you can enter a custom port number for the web interface (80 for HTTP, 443 for HTTPS). This provides an extra layer of security, as you can use “security through obscurity” to hide the pfSense webConfigurator from others (this is especially valuable if, for whatever reason, you have to be able to access the webConfigurator from the WAN interface).

The next setting is “Max Processes“, in which you can alter the number of webConfigurator processes that are allowed to run simultaneously. Increasing the number of instances allows more users/browsers to access the GUI concurrently. Next is the “Disable webConfigurator redirect rule“. When this check box is unchecked, access to the pfSense web interface is always permitted from the WAN, even on port 80, regardless of the listening port is configured. Checking this box disables this access. If it is checked, access to the webConfigurator can be allowed, but only via an explicit rule and via NAT port forwarding.

The next setting is “Disable web configurator login autocomplete” When this in unchecked (the default), login credentials for the webConfigurator maybe saved by the browser. Checking this check box disables autocomplete on the login form so that browsers will not prompt to save credentials, but not all browsers respect this option.

Next is “Disable logging of webConfigurator successful logins“; when this is checked, successful logins to the webConfigurator will not be logged. When unchecked, “Disable webConfigurator anti-lockout rule” will allow access to the pfSense web interface regardless of what firewall rules are set. If this box is checked, then access from the LAN will still be possible if the web interface is set to port 80 and the default “Anti-Lockout Rule” is still in place (or if a rule is created to allow traffic on whatever port you choose). Make sure such a rule is in place before you check this box, or you could lock yourself out.


Disable DNS Rebinding Checks” when unchecked blocks private IP responses from your configured DNS servers. Sometimes, however, it may interfere with webConfigurator access or name resolution; if so, you can check this box so that such private IP responses will not be blocked. Below this, at “Alternate Hostnames for DNS Rebinding and HTTP_REFERER Checks“, you can specify alternate hostnames by which the router may be queried to bypass the DNS rebinding attack checks (hostnames should be separated by spaces). Finally, when unchecked, “Disable HTTP_REFERER enforcement check” will disable access to the webConfigurator from scripts that try to redirect traffic based on the HTTP_REFERER field. Checking this box disables this protection, which may help if you use external scripts to interact with the system.

External Links:

HTTP_referer at Wikipedia

The post webConfigurator Options in pfSense appeared first on pfSense Setup HQ.

Admin Access Options in pfSense

$
0
0

In this follow-up to a previous article on webConfigurator options, I will look at the other Admin Access options you can configure by navigating to System -> Advanced and clicking on the Admin Access tab.

Admin Access Options: Secure Shell

Admin

SSH and serial port options in advanced settings in pfSense 2.0.

Under the “Secure Shell” heading, the first check box, “Enable Secure Shell”, enables you to login to the admin console via SSH. A terminal emulator such as xterm, Konsole, (or Putty under Windows) can be used to login. The next check box, “Disable password login for Secure Shell (RSA/DSA key only)” allows you to login with a public/private key pair instead of a password. Describing in depth how to do this is beyond the scope of this article (I have provided more detailed instructions in my article on SSH server configuration), but there are three basic steps. First, you need to generate a public/private key pair using a utility such as ssh-keygen or PuTTYGen. Second, you need to check the “Disable password login for Secure Shell” check box and save the settings. Third, you need to navigate to System -> User Manager, edit the settings for the admin account, and paste the newly-generated public key into the text box that appears when the “Click to paste an authorized key” check box is checked and save the settings. Finally, “SSH Port” enables you to change the SSH port (leave it blank for the default of 22). Changing the SSH port is often a good idea, as it makes it less likely that the admin account will be hacked via SSH.

Admin Access Options: Serial Port Access

Under the Serial Terminal heading, check the “Serial Terminal” check box to enable console access via the first serial port with settings of 9600 baud/8 bits/no parity/1 stop bit. This will redirect the console output and messages to the serial port, but you can still access the console menu from the internal video card and keyboard. A null modem serial cable or adapter is required to use the serial cable. Finally, under the Console Options heading, checking the “Password protect the console menu” will cause the console to prompt the user for a password (changes to this option will take place after a reboot) before performing admin functions.


External Links:

How to Enable SSH Access at doc.pfsense.org

Secure Shell at Wikipedia

The post Admin Access Options in pfSense appeared first on pfSense Setup HQ.

SYN Flood Prevention in pfSense

$
0
0

SYN Flood Attacks Explained

A SYN flood is a denial-of-service attack in which an attacker sends a succession of SYN requests to a target’s system in an attempt to consume enough server resources to make the system unresponsive to legitimate traffic. It takes advantage of a weakness in the TCP protocol: the three-way handshake. When a client attempts to start a TCP connection to a server, the client and server exchange a series of messages, like this:

  1. The client requests a connection by sending a SYN (synchronize) message to the server.
  2. The server acknowledges this request by sending SYN-ACK back to the client.
  3. The client responds with an ACK, and the connection is established.

A SYN flood works by not responding to the server with the expected ACK code. The malicious code can go about this in one of several ways:

  1. The client can simply not send the expected ACK.
  2. The client can spoof the source IP address in the SYN, causing the server to send the SYN-ACK to a falsified IP address, which will not send an ACK because it knows that it never sent a SYN.
  3. Both these attacks involve a single attacker, and as a result, if the attack is traced back to its true source, it can easily be shut down. An attack has a much greater chance of success if the attacker takes advantage of numerous drone machines throughout the internet, and is much more difficult to stop. If the drones use multiple spoofed addresses, the attack will likely be even more effective.
  4. If the attacker has some knowledge of the listener’s operating system, they can fine-tune the attack. For example, if they know the size of the backlog that is used and how long it keeps TCBs in SYN-RECEIVED before timing out and reaping them, they can send a number of SYNs equal to the backlog, and repeat this process periodically as TCBs are reclaimed in order to keep a listener unavailable perpetually.


The server will wait for the acknowledgement for some time, as network congestion could be the cause of the missing ACK, but in an attack increasingly large numbers of half-open connections will bind resources on the server until no new connections can be mad, resulting in a denial of service to legitimate traffic.
The SYN flooding attack became well-known in 1996, when the magazines 2600 and Phrack published descriptions of the attack along with source code to perform it. Attacks on ISPs soon followed, and CERT released an advisory on the attack technique. The protocol flaw in TCP that makes SYN flooding effective is that for the small cost of sending a packet, a client causes a relatively greater expense to the listener by forcing the listener to reserve state in a TCB. A better technique is to make the listener operate statelessly until the initiator can demonstrate its legitimacy. One example of this is the Stream Control Transmission Protocol (SCTP), which has a 4-way handshake, with listener TCB state being created only after the initiator echoes back some “cookie” bytes sent to it by the listener.
Nevertheless, TCP is here to stay, and thus we are forced to resort to other countermeasures. Some well-known countermeasures (listed in RFC 4987) include:

  1. Filtering
  2. Increasing backlog
  3. Reducing SYN-RECEIVED timer
  4. Recycling the Oldest Half-Open TCB
  5. SYN cache
  6. SYN cookies
  7. Hybrid approaches
  8. Firewalls and proxies

Preventing SYN Flood Attacks in pfSense

SYN flood

Limiting the number of connections per second in a firewall rule.

There are several common methods of preventing a SYN flood attack under pfSense. They all have their advantages and disadvantages, and your mileage may vary based on your own security concerns.

The first method is modifying the WAN rule for whichever rule allows traffic to pass to the server you wish to protect. Navigate to Firewall -> Rules and click on the “WAN” tab. Click on the “e” (for edit) to the right of the rule which allows traffic to the server (we are assuming the rule was already created). On the settings page for this rule, scroll down to “Advanced features” and press the “Advanced” button to the right of “Advanced Options“. At “Maximum new connections / per seconds“, set these parameters to 10 and 1, a maximum of 10 connections per second. This will blacklist the IP if it tries to make more than 10 connections per second. You may need to tweak this number; depending on what servers are listening, it may be too low. Press the “Save” button to save the settings, and, if necessary, press “Apply changes“.

Once you have changed the rule, you can run pfctl from a shell to inspect the blocked table:

pfctl -t virusprot -Ts

To delete an item in the blacklist, use this command from the shell:

pfctl -t virusprot -T delete $IPADDRESS

or pfctl -t virusprot -Td $IPADDRESS

where $IPADDRESS is the address to be deleted.

SYN flood

Changing the state type to synproxy in a firewall rule.

Another way of hardening your network against a SYN flood attack is to change the state type of a firewall rule to synproxy. In order to do this, edit this rule, and under “Advanced options“, press the “Advanced” button to the right of “State Type“. In the dropdown box, change the state type to “synproxy state” and press the “Save” button to save the settings, and, if necessary, press “Apply changes“. SYN Proxy stops SYN flood attacks by having the firewall act as a proxy for the target server in performing the three-way handshake. When SYN-Proxy is enabled, the firewall responds with a SYN-ACK packet instead of the server. If the client does not respond with an ACK packet, the handshake is not completed. If an ACK is received, then the handshake is completed and the firewall allows a connection to the server. If it is a SYN-flood attack where the attacker never responds with an ACK, the server never receives any packets from the attacking client and is oblivious to the attack.

A third method of protecting against SYN flood attacks is to use SYN cookies. This is a method of preventing the SYN queue from filling up by sending back a SYN-ACK packet in response to a SYN packet, but discarding the SYN queue entry. If the server receives a subsequent ACK response from the client, it can reconstruct the SYN queue entry using information encoded in the TCP sequence number. SYN cookies do not break any protocol specifications and thus should be compatible with all TCP implementations. SYN cookies are enabled by default in pfSense; if you need to enable them, navigate to System -> Advanced and click on the “System Tunables” tab. Click on the “e” to the right of “net.inet.tcp.syncookies” in the table, and change the value of this parameter to 1. Then press “Save” to save the changes and “Apply changes” to apply the changes if necessary.

These are some of the more obvious solutions to the problem of SYN flood attacks and are relatively easy to implement, but there are other methods (e.g., increasing the size of the SYN queue might work, or expiring the oldest half-open connections) that might be more effective in protecting your network. If you have alternate suggestions, I would love to hear them, so feel free to comment.

External Links:

SYN flood at Wikipedia

SYN cookies at Wikipedia

Defenses Against TCP SYN Flooding Attacks at cisco.com

pfctl options at gsp.com

The post SYN Flood Prevention in pfSense appeared first on pfSense Setup HQ.

Firewall Advanced Options in pfSense

$
0
0

Previously, I covered the advanced admin access options in pfSense (Web Configurator Options, Admin Access Options). In this article, I will cover the advanced firewall options. These you can find by navigating to System -> Advanced and click on the “Firewall/NAT” tab.

Firewall Advanced Options

Firewall

Advanced firewall options in pfSense.

Under the “Firewall Advanced” heading, you will find several options. First is the “Clear invalid DF bits instead of dropping the packets” check box. This will allow communication with hosts the generate fragmented packets with the don’t fragment bit set (DF), such as Linux NFS. This will cause the filter to not drop such packets; it will instead clear the DF bit. Next is the “Insert a stronger id into IP header of packets passing through the filter” check box. This will replace the IP identification field of packets with random values to compensate for operating systems that use predictable values. It only applies to packets that are not fragmented after the optional packet reassembly.

The next option is “Firewall Optimization Options“. There are four options for state table optimization in the dropdown box:

  1. normal – this is the normal optimization algorithm.
  2. high-latency – this is used for high latency links, such as satellite links (where there is a large delay between frames). When invoked, it expires idle connections later than the default.
  3. aggressive – this expires idle connections more quickly. It makes more efficient use of CPU and memory but can drop legitimate connections. This is best used with low-latency connections.
  4. conservative – this will cause pfSense to try to avoid dropping any legitimate connections at the expense of increased memory usage and CPU utilization.


Next is the “Disable all packet filtering” check box. Checking this check box will convert pfSense into a routing-only platform and also turn off NAT. You probably should only use this option if you know what you’re doing. The next check box is “Disables the PF scrubbing option which can sometimes interfere with NFS and PPTP traffic“. The scrubbing process will cause PF to drop any incoming packets with illegal TCP flag combinations (such as SYN and RST) and to normalize potentially ambiguous combinations (such as SYN and FIN). There may be certain situations where you want to allow illegal/ambiguous TCP flag settings, so check this box if such a situation arises.

Next is “Firewall Maximum States“, which is the maximum number of connections to hold in the firewall state table. “Firewall Maximum Tables” allows you to set the maximum number of tables for systems such as aliases, sshlockout, snort, etc. After this is “Firewall Maximum Table Entries“, the maximum number of table entries, where lists of IPs are held. In all three of these edit boxes, you can leave them blank to retain the default setting. It should be noted that for these settings, the default values are determined based on the amount of RAM available in the system. More RAM means a larger default. The default is designed to be reasonable for most cases, but in some cases, it would need to be increased. You can set these numbers as high as you can handle in terms of RAM. For example, 1 state equals 1K of RAM, so 1 million states = 1K * 1 million, or 1 GB of RAM. Thus you will need 1 GB plus whatever you need for the firewall tables which contain IP addresses.

In the next article in this series, we will continue our look at advanced firewall and NAT options.

External Links:

How to solve connectivity issues with dropped RA and PA packets at knowlege.zomers.eu

The post Firewall Advanced Options in pfSense appeared first on pfSense Setup HQ.

NAT and Firewall Advanced Options in pfSense

$
0
0

In this article, I will cover some additional advanced settings available for firewall and NAT, which you can find by navigating to System -> Advanced and clicking on the “Firewall/NAT” tab.

Firewall Advanced Options

NAT

Advanced firewall and NAT options in pfSense.

Under “Firewall Advanced”, you will find the “Bypass firewall rules for traffic on the same interface” check box. This option applies only if you have defined one or more static routes (and presumably, at least one gateway; I covered configuring static routes in a previous article). If multiple subnets are connected to the same interface (e.g., if you divide the LAN into two or more separate subnets), using this option may be advantageous.

Next is the “Disable all auto-added VPN rules” check box. Checking this will disable any rules automatically added when a VPN was created. Next is the “Disable reply-to on WAN rules” check box. With Multi-WAN, you generally want to ensure traffic leaves the same interface it arrives on. Hence, reply-to is added automatically by default. When using bridging (or 1:1 NAT port forwarding with multiple interfaces), you must disable this behavior (by checking this box) if the WAN gateway IP is different from the gateway IP of the hosts behind the bridged interface. Finally, there is the “Disable Negate rule on policy routing rules” check box. With Multi-WAN, you generally want to ensure traffic reaches directly connected networks and VPN networks when using policy routing. You can disable this for special purposes (by checking this box), but it requires manually creating rules for this network.


NAT Advanced Options

The next section is “Network Address Translation”. The first option is the “Disable NAT Reflection for port forwards” check box. With NAT reflection, packets from internal networks that are addressed to the network’s public IP address will be treated as if they are coming from from the WAN interface. The router’s port forwarding rules will then determine where the packets go. Checking this box disables the automatic creation of additional NAT redirect rules for access to port forwards on your external IP addresses from within your internal networks.

Next is “Reflection Timeout“. This edit box allows you to set a NAT reflection timeout in seconds. The next option is the “NAT Reflection for 1:1 check box“. Checking this disables the automatic creation of additional NAT 1:1 mappings for access to 1:1 mappings of your external IP addresses from within your internal networks. The next check box is “Automatically create outbound NAT rules which assist inbound NAT rules that direct traffic back out to the same subnet it originated from.” This only applies to 1:1 NAT rules, and is helpful when NAT reflection is enabled.

The last option is “TFTP Proxy“. You can click on an interface listed (hold down SHIFT to select multiple interfaces) to enable TFTP proxy on the interface. Since TFTP is considered to be a security risk (no security or authentication is provided by the protocol specification), this option should only be enabled if absolutely necessary. Finally, click on “Save” to save the changes.

Other articles in this series:

webConfigurator options in pfSense

Admin Access Options in pfSense

Firewall Advanced Options in pfSense

External Links:

Network Address Translation at Wikipedia

The post NAT and Firewall Advanced Options in pfSense appeared first on pfSense Setup HQ.


Advanced Networking Options in pfSense

$
0
0

This article covers advanced networking options in pfSense, which can be altered by navigating to System -> Advanced Options and clicking on the “Networking” tab.

Advanced Networking Options: IPv6

Advanced networking

Advanced networking options in pfSense.

Under the “IPv6 Options” heading, the first option is the “Allow IPv6” check box. Checking this box allows pfSense to use Internet Protocol version 6, the latest revision of the Internet Protocol, which uses a 128-bit address and thus solves the problem of IPv4 (32-bit) address exhaustion. [IPv6 also adds a number of features not present in IPv4, such as stateless address autoconfiguration, network renumbering, and router announcements when changing network connectivity providers.] Next is the “Enable IPv4 NAT encapsulation of IPv6 packets” check box. Checking this box provides an RFC 2893 compatibility mechanism that can be used to tunneling IPv6 packets over IPv4 infrastructures. If enabled, you need to add a firewall rule to permit IPv6 packets.


Advanced Networking Options: Network Interfaces

Under the “Network Interfaces” heading, the first check box is “Enable device polling“. Device polling lets the system poll network devices for new devices instead of relying on interrupts, which prevents services from becoming inaccessible due to interrupt floods. However, not all network cards support polling, so if you check this box, make sure that your hardware supports device polling.

Next is the “Disable hardware checksum offload“. Checksums are used to ensure the integrity of data portions when frames are transmitted. A network card that receives a frame will calculate the checksum and compare it to the checksum received. If the checksums do not match, a transmission error has occurred and the frame will be re-sent. Checksum offloading, however, is broken with some cards, particularly Realtek ones. Check this box if checksum offloading is a problem. The next check box is “Disable hardware TCP segmentation offload“. The TVP offload engine is a technology used in some network cards to offload processing of the entire TCP/IP stack to the network controlling, thus freeing up the CPU and potentially reducing traffic on whatever interface the network card is on (e.g. PCI or PCI-express). As with checksum offloading, TCP segmentation is broken in some hardware drivers, so checking this box may solve problems with such hardware. The next option is the “Disable hardware receive offload” check box. Large receive offload (LRO) is a technique for increasing inbound throughput of high-bandwidth network connections by aggregating multiple incoming packets into a large buffer before these packets are passed up the networking stack. This has the effect of reducing the number of packets that have to be processed and thus it reduces CPU overhead. Again, LRO is broken in some hardware drivers and checking this option may solve problems with these drivers.

The last of the advanced networking options is “Suppress ARP messages“. This option was discussed in my article on ARP configuration in pfSense. In some cases you may have two network cards on the same physical network, but on different subnets. Everything works, but you get a whole bunch of error messages in the system log whenever a node replies to an ARP request from an interface on the same broadcast domain but a different subnet. These error messages may hide some of the more important error messages. In such cases, you may want to check this option and suppress these ARP log messages.

Other articles in this series:

webConfigurator options in pfSense

Admin Access Options in pfSense

Firewall Advanced Options in pfSense

NAT and Firewall Options in pfSense

External Links:

IPv6 at Wikipedia

Check

TCP offload engine at Wikipedia

Large receiver offload at Wikipedia

The post Advanced Networking Options in pfSense appeared first on pfSense Setup HQ.

Advanced Miscellaneous Settings in pfSense

$
0
0

In this article, I will cover some of the Advanced Miscellaneous settings for pfSense. These settings can be found by navigating to System -> Advanced and clicking on the “Miscellaneous” tab.

Advanced Miscellaneous Settings: Proxy Support, Load Balancing, and Power Savings

Advanced Miscellaneous

Some of the Advanced Miscellaneous settings in pfSense.

The first heading in Advanced Miscellaneous settings  is “Proxy Support”. These settings allow you to configure an external web proxy, rather than add a web proxy such as Squid to pfSense. The first option is “Proxy URL“. In this edit box, specify the URL or IP address of the proxy. Next is “Proxy Port“, which specifies the port to use to connect to the proxy (the default is 8080 for HTTP, or 443 for SSL). Then there is “Proxy Username” and “Proxy Pass“, the username and password for the proxy server.

The next heading in Advanced Miscellaneous settings is “Load Balancing”. I already covered load balancing in a series of previous articles (part one part two part three), so I will keep this brief, but I will note that there are two important settings pertaining to load balancing here. The first is the “Use sticky connections” check box. This setting applies in cases where you have a pool with multiple servers with load balancing enabled. Typically, when load balancing is invoked, successive connections are redirected to the servers in a round-robin fashion, and we don’t care if successive connections from the same source are redirected to different servers. Sometimes we do care, however, and in those cases we can check this check box. If this box is checked, successive connections from the same source will be sent to the same web server. This is referred to as a “sticky connection”, and it will exist as long as there are states in the state table that refer to the connection. Once the states expire, so will the sticky connection, and further connections from that host will be redirected to the next server in the round robin pool.

The second check box is “Allow default gateway switching“. If this box is checked, then if the default gateway fails, it will be switched to another available one. This is useful if you have a multi-WAN setup. If the default gateway fails, outbound traffic will be directed to another gateway (e.g. WAN2), and you will still be able to access the internet. If you do not have this box checked, however, even if you have a multi-WAN setup, if the default gateway fails you will lose internet.


The next heading in Advanced Miscellaneous settings is “Power savings”. Here you will find the “Use PowerD” check box. Checking this box invokes the powerd utility, which monitors the system state and sets various power control options accordingly. There are three modes for powerd: maximum, minimum, and adaptive. Maximum mode chooses the highest performance values; minimum mode selects the lowest performance values (which in turns yields the greatest power savings). Adaptive mode attempts to strike a balance between these two settings by degrading performance when the system appears idle and increasing it when the system is busy. Checking this box will invoke powerd in adaptive mode, if nothing else is changed. There is no way to change the mode to min or max from the GUI (yet). If you want to change the mode, however, you can always edit /etc/inc/system.inc manually. In order to do so, log into your pfSense box via SSH, open up system.inc in vi like so:

vi /etc/inc/system.inc

and look for the function activate_powerd(). You shouldn’t have to scroll down very far. Look for the following line to edit:

exec(“/usr/sbin/powerd -b adp -a adp”);

the “-b” parameter is for battery and “-a” is for A/C. “adp”, of course, is short for “adaptive”. Chnage these parameters to either “min” for minimum mode or “max” for maximum mode as you see fit; then hit the ESCAPE key and type :wq to save the modified file.

In a future article, I will cover more Advanced Miscellaneous settings, including glxsb crypto acceleration and IP settings.

Other articles in this series:

webConfigurator options in pfSense

Admin Access Options in pfSense

Firewall Advanced Options in pfSense

NAT and Firewall Options in pfSense

Advanced Networking Options in pfSense

External links:

Default gateway switching discussion on doc.pfsense.org

powerd options discussion on doc.pfsense.org

The post Advanced Miscellaneous Settings in pfSense appeared first on pfSense Setup HQ.

Advanced Miscellaneous Options in pfSense: Part Two

$
0
0

In the previous article, I covered the proxy support, load balancing, and power saving options in the advanced pfSense settings. In this article, I will cover the remaining options found by navigating to System -> Advanced and clicking on the “Miscellaneous” tab.

Crypto Acceleration

Advanced Miscellaneous

Other advanced miscellaneous options in pfSense.

The first option that will be covered is found under the “glxsb Crypto Acceleration” heading. Check on the “Use glxsb” check box if you want to enable AMD Geode’s glxsb acceleration. Cryptographic acceleration is available on several platforms, typically on embedded boards such as ALIX and Soekris, but also with add-on cards such as those from Hifn are also supported. Any crypto accelerator supported by FreeBSD will work. Boards utilizing the AMD Geode platform typically have the “AMD Geode LX Security Block” which supports certain encryption types. The AMD Geode LX Security Block will accelerate some cryptographic functions on systems which have the chip. If you have a cryptographic acceleration card with the Geode LX processor, you can check this box. If you have a Hifn cryptographic card, however, do not use this option, as it will take precedence and the Hifn card will not be used. If you do not have a glxsb chip in your system, this option will have no effect. To unload the module, uncheck this option and then reboot.


IPsec Options

Under the “IP Security” heading, there are several settings pertaining to IPsec VPN tunnels. The first setting is the “Prefer older IPsec SAs” check box. In an IPSec VPN tunnel, IPsec secured links are defined in terms of security associations (SAs). Each SA is defined for a single unidirectional flow of data, and usually from one single point to another, covering traffic distinguishable by some unique selector. All traffic flowing over a single SA is treated the same. By default, if several security associations match, the newest one is preferred if it is at least 30 seconds old. Selecting this option causes pfSense to always prefer old SAs over newer ones.

The next option is the “Start racoon in debug mode” check box. Racoon is an Internet Key Exchange (IKE) daemon for automatically keying IPsec connections, to establish security associations with other hosts. Checking this box launches racoon in debug mode so that more verbose logs will be generated to aid in troubleshooting. Changing this setting will restart racoon, which could interrupt VPN connections. The last setting under this heading is “Enable MSS clamping on VPN traffic“. Checking this box allows you to adjust the maximum segment size (MSS) on TCP flows over VPN by typing a different segment size into the edit box below the check box. This helps overcome problems with PMTUD on IPsec VPN links and therefore is sometimes advantageous. If left blank, the MSS remains at the default value of 1400 bytes.

Other Options

The next heading is “Schedules” and the only option is the “Schedule States” check box. By default, schedules clear the states of existing connections when the expiry time has come. Checking this box overrides that behavior by not clearing states for existing connections. The final heading on this page is “Gateway Monitoring”, and has one option: the “States” check box. By default, the monitoring processs will flush states for a gateway that goes down. Checking this box overrides this behavior by not clearing states for existing connections.

Other articles in this series:

webConfigurator options in pfSense

Admin Access Options in pfSense

Firewall Advanced Options in pfSense

NAT and Firewall Options in pfSense

Advanced Networking Options in pfSense

Advanced Miscellaneous Options in pfSense

External Links:

Are cryptographic accelerators supported at doc.pfsense.org

IPsec for Dummies at people.freebsd.org

The Racoon man page

The post Advanced Miscellaneous Options in pfSense: Part Two appeared first on pfSense Setup HQ.

Book Review: The Book of PF

$
0
0

The Book of PFThe Book of PF: A No-Nonsense Guide to the OpenBSD Firewall (2nd Edition)
Author: Peter N.M. Hansteen
Publisher: No Starch Press
Publishing Date: November 19, 2010 (2nd Edition)
216 pages (paperback edition)

Book Review

In all my years in IT, I have read a number of computer books, but relatively few of these books I would count as indispensible. For C/C++, there was the elegantly written C Programming Language book written by Kernighan and Ritchie. When I learned Windows programming, Programming Windows® by Charles Petzold proved to be an invaluable resource. Around 1995-96 when I became interested in Java, I used one of the O’Reilly books as my tutorial. Some of the O’Reilly books (as well as ones produced by Sams Publishing) were invaluable in providing some of my initial education in Linux in the 1990s. So when I came across The Book of PF: A No-Nonsense Guide to the OpenBSD Firewall by Peter N.M. Hansteen (2nd Edition, No Starch Press, 2010), I was curious to see how it would measure up.

As it turned out, The Book of PF is a worthwhile read, and for those seeking a more detailed understanding of PF, it should prove quite useful. The book is not a cookbook, as the author states fairly explicitly in the introduction. Thus it does not contain a series of how-to instruction sets; nonetheless, those with little knowledge of pf need not fear, as Hansteen starts with simple concepts and builds on these concepts in subsequent chapters. In this way, he is able to progress from very simple PF rule sets (e.g. block all outside traffic except the ports that need to be open, and only the protocols that are needed) sets to somewhat more involved rule sets (ones for networks that run SSH, FTP, and e-mail services), to even more complex rule sets that start to approximate real world scenarios. It also stresses the importance of making rule sets that are as granular as possible so as to allow only the traffic you really want. I like Hansteen’s attitude as well: he challenges readers not to cut and paste rule sets, but to think for themselves, and he also seems to disdain what he considers overly prophylactic policies such as blocking ping and traceroute. The book will also be a good guide for those who want to effectively protect their networks using such services as synproxy, relayd (for expiring nonfunctional hosts from a load balancing pool), and spamd (for blocking spam).


For those techies who only want to learn about pfSense, there are other books. If you just want to know the basics about how to configure your pfSense box, there’s the pfSense 2 Cookbook by Matt Williamson. If you want a more comprehensive explanation of pfSense’s features, pfSense: The Definitive Guide by Christopher M. Buechler (one of the co-founders of pfSense), Jim Pingle and Michael W. Lucas is likely the book for you. But for the network tech or admin who does not mind working primarily at the command line and editing rule sets manually, “The Book of PF” is a potentially valuable guide. Whether or not its worth your time to understand the nuances of pf is a cost-benefit analysis you will have to make yourself. But you will gain a greater degree of control you could ever hope to have working with the pfSense user interface alone. For example, take the problem of SSH brute force attacks. pfSense allows you to set a maximum number of connections per second, and you can block an IP address or a range of IP addresses. But as far as I know, pfSense does not enable you to set a maximum connection rate and add an IP address to a table of blocked IP addresses if it exceeds the rate. pf makes this possible, and this book shows you how. And this is just one example of how this book demonstrates how you can fine-tune your firewall’s settings; there are many other such instances.

For those really wanting to acquire an in-depth knowledge of pf, BSD and networking in general, Hansteen has included a list of resources as the first appendix to the book. Needless to say, it is chock full of helpful links and contains a bibliography which should provide a good starting point for anyone whose interest in BSD has been piqued.

In conclusion, The Book of PF is not for everyone, but if you are serious about network security, it can potentially be a useful guide. Not only will you be able to customize your firewall rules to meet your requirements, a working knowledge of pf is arguably even more valuable in the long term than a working knowledge of pfSense. pfSense superseded m0n0wall as the firewall/router of choice among many network security experts and will likely be superseded itself someday. pf may or may not be replaced as the primary packet filter for BSD users, but even if it is, my guess is that the structure of the rules will likely be similar, so if you have a good knowledge of pf, the learning curve should not be that steep. As the only in-depth book on pf, The Book of PF is recommended for anyone who wants to gain a better understanding of OpenBSD’s packet filtering engine.

External Links:

The Book of PF: A No-Nonsense Guide to the OpenBSD Firewall at Amazon

The post Book Review: The Book of PF appeared first on pfSense Setup HQ.

Spam Blocking in BSD with spamd: Part One

$
0
0

SpamKeeping spam out of the network is one of the more conspicuous responsibilities of the typical network tech. Fortunately, not only is FreeBSD (the OS under which pfSense runs) secure and solid, but tools are available for this platform which should make your life easier.

Spam Blocking: Enter spamd

The main tool for combating spam under BSD is spamd. Spamd is a BSD-licensed lightweight spam-deferral daemon written for OpenBSD. It is included with OpenBSD, and is designed to work in conjunction with pf, and should be fully functional on any POSIX system where pf is available, including NetBSD, FreeBSD, and DragonFly BSD. This daemon’s design is based on the following underlying assumptions:

  • Spammers send a large number of messages, and the probability that you are the first person receiving a particular message is small.
  • Spam is sent mainly by a few spammer-friendly networks and a large number of hijacked machines.

Both the messages and the machines will be reported to blacklists quickly, and you can use these blacklists as the basis of your own blacklist. When a blacklisted computer makes an SMTP connection to your e-mail server, spamd presents its banner and immediately switches to a mode where it answers SMTP traffic 1 byte at a time. If the sender is patient enough to complete the SMTP dialogue, which will take ten minutes or more, spamd will return a “temporary error” code (4xx), which indicates that the message could not be delivered successfully and that the sender should keep the mail in his queue and retry later. If he does, the same procedure repeats, until he gives up, which should waste both his queue space and socket handles for several days. Such a process is called tarpitting, and it has the potential to tie up the spammer’s resources to a significant degree at a minimal cost to the system defending against such an attack.


spamd can be used quite effectively as a traditional spam filter, with a blacklist and a whitelist. But it also supports greylisting, which works by rejecting messages from unknown hosts temporarily with 4xx reply codes (temporary errors). Fully capable SMTP implementations are expected to maintain queues for retrying message transmissions in such cases (this behavior is required if an SMTP sender is to comply with the relevant RFCs). When a sender has proven itself able to properly retry delivery, it will be whitelisted for a longer period of time, so that future delivery attempts will be unimpeded. The viability of greylisting as a tactic for blocking unwanted e-mail was first discussed in a 2003 paper by Evan Harris. It is a simple technique, and amazingly enough, it still works, as spammers and malware writers have been slow to adapt.

External Links:

spamd at Wikipedia

RFC 1123 and RFC 2821 at IETF – the key RFCs concerning SMTP’s fault tolerance capabilities

Giving spammers a hard time – a tutorial

Annoying spammers with pf and spamd

spamd tarpit/greylisting “how to”

The post Spam Blocking in BSD with spamd: Part One appeared first on pfSense Setup HQ.

Spam Blocking in BSD with spamd: Part Two

$
0
0

spamdIn part one of this series, I discussed some of the advantages of spamd and how it works. In this article, I will cover spamd configuration.

spamd Configuration

Configuring the spamd daemon is pretty straightforward. First, you have to edit your rule set in /etc/pf.conf to include the following:

table persist
table persist
 pass on $ext_if inet proto tcp from <spamd> to \
( $ext_if, $localnet ) smtp rdr-to 127.0.0.1 port 8025
pass on $ext_if inet proto tcp from \

!<spamd-white> to ( $ext_if, $localnet ) port smtp rdr-to 127.0.0.1 port 8025

These rules set up two tables, (a table of known spammers) and (a list of whitelisted hosts which we assume are not spammers). SMTP traffic from the addresses in the first table () plus the ones not in the second table () is redirected to a daemon listening at port 8025 of the machine. The application which uses these tables, of course, is spamd, which is designed to waste spammers’ time and keep their traffic off our network.


You also need to edit your spamd.conf file (under FreeBSD. it should be located at /usr/local/etc/spamd/spamd.conf). First, you need to define which lists you will use:

all:\
:my_blacklist:my_whitelist:

This is where you add all the blacklists you want to use, separated by colons (:). If you want to use whitelists to subtract addresses from your blacklist, you add the name of the whitelist immediately after the name of each blacklist.

Next, you need to define your blacklist:

my_blacklist:\
:black:\
:msg=”SPAM. Your address %A has sent pam with the last 24 hours”:\
:method=http:\
:file=www.openbsd.org/spamd/traplist.gz

After the name, the first data field specifies the list type (black). The msg field contains the message to display to blacklisted senders during the SMTP dialogue. The method field specifies how spamd-setup fetches the list data. In this example, the type is http, but there are other options: you can fetch the list data via ftp, from a file in a mounted file system or via exec of an exernal program. The file filed specifies the name of the file spamd expects to receive.

You also need to define a whitelist:

my_whitelist:\
:white:\
:method=file:\
:file=/etc/mail/whitelist.txt

The whitelist in this example is similar to the blacklist, only the message parameter is omitted since it is not needed, and the source is a file on the local system.

You should be aware that enabling the suggested blacklists in the default spamd.conf could lead to blacklisting of large blocks of the internet, including several countries such as South Korea. Using other lists than the default ones is possible, and its within your discretion to use other ones or to make your own copy of the default blacklist and edit it as needed.

Next, put the lines for spamd and the startup parameters you want in /etc/rc.conf or /etc/rc.conf.local. In FreeBSD, spamd_grey has to be set to YES to enable greylisting (on OpenBSD 4.1 and later, spamd runs in greylisting mode by default and you need to set spamd_black to YES to run spamd in pure blacklisting mode. There are several parameters that can be used; see the spamd man page for a complete list of these options.

You can then view the table contents using pfctl or other applications. If you want to change or delete entries, you should use the spamdb utility, not pfctl. Also, note that if the redirection (rdr) rules you use do not include a “pass” part, you need to set up pass rules to let through traffic to your redirection, and also set up rules to let legitimate e-mail through.

External Links:

spamd man page at openbsd.org

The Apache SpamAssassin Project – download SpamAssassin here; you can also find SpamAssassin’s documentation.

The post Spam Blocking in BSD with spamd: Part Two appeared first on pfSense Setup HQ.

Spam Blocking in BSD with spamd: Part Three (Greylisting)

$
0
0

greylistingIn part one and part two of this series, I discussed the advantages of using spamd and some basic configuration steps. In this article, I will cover greylisting in more detail.

The Problem

Spammers try to use other people’s equipment to send their messages. In addition, the software they install without the legal owner’s permission needs to be lightweight in order to run undetected. Moreover, spammers do not typically consider any individual message they send to be important. From this we can conjecture that the typical spam sender is probably not set up to interpret SMTP status codes correctly, if at all.

The current standard for Internet e-mail transmission is defined in RFC 2821. Section 4.5.4 covers retry strategies, and subsection 4.5.4.1 covers sending strategies. This section specifies the following:

  1. Mail that cannon be transmitted MUST be queued and periodically retried by the sender.
  2. The sender MUST delay retrying a particular destination after one attempt has failed. In general, the retry interval SHOULD be at least 30 minutes; however, more sophisticated and variable strategies will be beneficial when the SMTP clients can determine the reason for non-delivery.
  3. Retries continue until the message is transmitted or the sender gives up; the give-up time generally needs to be at least 4-5 days. The parameters to the retry algorithm MUST be configurable.


// ]]>

The Solution

We can use these requirements to our advantage. When a compromised machine is used to send spam, the sender application tends to try delivery only once, without checking for any results or return codes. Real SMTP implementations interpret SMTP return codes and act on them, as explained above. E-mail, like most other Internet services, are described as best-effort services, with a significant amount of design and development being put into make services such as SMTP fault tolerant. Thus, real mail servers retry if the initial attempt fails with any kind of temporary error.
This is what is so elegant about greylisting. spamd reports a temporary local problem to the client. Well-behaved senders with legitimate messages will try to resend the message later, but spammers have no interest in waiting for the chance to retry, since it will increase their cost of delivering the messages. Thus, the spammers will keep hammering spamd, and will get greylisted.

Configuring spamd for Greylisting

Setting up spamd for greylisting is fairly easy, although under FreeBSD, you need to have a file descriptor filesystem mounted on /dev/fd. You can do this by adding this line to your /etc/fstab file (fstab lists all the available static disks and disk partitions and where they are to be mounted):

fdescfs /dev/fd fdescfs rw 0 0

You also want to place the relevant lines in /etc/rc.conf or /etc/rc.conf.local; e.g.:

spamd_flags = “-v -G 2:4:864″
spamd_grey = YES

This tells spamd to enable vpopmail configuration (-v); -G sets the passtime for greylisting to 2 minutes, greyexp to 4 hours and whiteexp to 864 hours (36 days). This means that the client must wait 2 minutes before resending an e-mail to avoid getting greylisted. A client will remain on the the greylist for 4 hours after violating this standard. If the client waits 2 minutes before resending, it will get whitelisted, and remain on the whitelist for 864 hours.

Why It Might Not Work

The reason why greylisting should work is because any standards compliant SMTP client is required to retry delivery after some reasonable amount of time. But there are circumstances in which it may not work. First of all, the first e-mail message sent from any site which has not contacted you for as long as the greylister keeps its data aroun will be delayed for some random amount of time which depends mainly on the sender’s retry interval. There are some circumstances where avoiding even a minimal delay is desirable. In addition, you are bound to encounter misconfigured mail servers which either do not retry at all or retry at all or retry too quickly, perhaps stopping delivery retries after a few attempts. Finally, there are some sites which are large enough to have several outgoing SMTP servers (e.g. GMail); these sites do not work well with greylisting since they are not guaranteed to retry delivery of any given message from the same IP address as the last delivery attempt for that message. The RFCs do not state that they new delivery attempts have to come from the same IP address, so these sites can legitimately claim to comply with the RFCs.

If you need to make allowances for such situations in your setup, it is fairly easy. One approach is to define a table for a local whitelist; the list should be fed from a text file in case of reboots:

table <my_localwhite> file “/etc/mail/local_whitelist.txt”

To make sure SMTP traffic from the addresses in the table is not fed to spamd, you add a no rdr rule at the top of your redirection block:

no rdr proto tcp from <my_localwhite> to $mailservers port smtp

Once you have added these changes to your rule set, enter the addresses you need to protect from redirection into the local_whitelist.txt file, then reload your rule set using pfctl -f.

External Links:

Greylisting on Wikipedia

RFC 2821 – the RFC with the specifications for Simple Mail Transfer Protocol (SMTP).

Greylisting.org – a site devoted to articles and tools related to greylisting.

Greylisting: The Next Step in the Spam Control War – Greylisting site created by Evan Harris, the guy who originally came up with the idea of greylisting. Also contains whitepapers and a fully functional example of greylisting called relaydelay.


The post Spam Blocking in BSD with spamd: Part Three (Greylisting) appeared first on pfSense Setup HQ.


Spam Blocking in BSD: Part Four (spamlogd and spamdb)

$
0
0

spamlogdIn parts one, two and three, I discussed the spamd daemon, how to configure it, and how to set it up for greylisting. In this part, I will discuss spamlogd and spamdb.

Using spamlogd

Spamlogd is a whitelist updater, and it works quietly in the background, recording logged connections to and from your mail servers to keep your whitelist updated. It thus manipulates the spamd database in /var/db/spamd used for greylisting. Spamlogd helps ensure valid e-mail to and from hosts you communicate with regularly goes through with a minimum of fuss.

In order to perform its job properly, spamlogd needs you to log SMTP connections to and from your mail servers (this will enable it to add IP addresses that receive e-mail from you to the whitelist). On OpenBSD 4.1 and later, you can create several pflog interfaces and specify which interface a rule should log to. If you want to separate the data spamlogd needs to read from the rest of your PF logs, create a separate pflog1 interface using this command:

ifconfig pflog1 create

Alternatively, you can create a hostname.pflog1 file that contains only the line “up”. We want to add this to the rules, or if you already have rules for logging, change them accordingly:

pass log (to pflog1) proto tcp from any to $emailserver port $email

pass log (to pflog1) proto tcp from $emailserver to any port smtp

Where $emailserver is the IP address of the e-mail server and $email is the port the server is listening on. Next you need to add:

-l pflog1

to spamlogd’s setup parameters. Now you have separated the spamd-related logging from the rest of the logging. Now, spamlogd will add the IP addresses that receive e-mail you send to the whitelist.


Using spamdb

If you need to view or change the contents of your blacklists, whitelists or greylists, then spamdb should be your main interface to managing the lists. From the earliest times, spamdb offered the capability of adding whitelist entries to the database (spamdb -a x.x.x.x) or deleting entries (spamdb -d x.x.x.x). Now, spamdb has even more capabilities, such as the capability of adding a client to a traplist for greylisting. For example:

sudo spamdb -T -a

will add the e-mail address specified to the traplist.

External Links:

spamlogd at openbsd.org

spamdb at openbsd.org

The post Spam Blocking in BSD: Part Four (spamlogd and spamdb) appeared first on pfSense Setup HQ.

Snort Installation in pfSense: Part One

$
0
0

snort installationIf you are running pfSense and are looking for an additional means of securing your network, you may consider installing snort on your pfSense system. Snort installation will be the subject of this next series of articles. Snort is an open source network intrusion prevention system (NIDS), capable of performing real-time traffic analysis and packet logging on IP networks. It can perform protocol analysis, content searching and matching, and can be used to detect a variety of attacks and probes, such as buffer overflows, stealth port scans, CGI attacks, SMB probes, OS fingerprinting attempts, and much more. Snort has three primary uses. It can be used as a straight packet sniffer like tcpdump, a packet logger, or as a full-blown network intrusion prevention system. In sniffer mode, the program will read network packets and display them on the console. In sniffer mode, the porgram will read network packets and display them on the console. In packet logger mode, the program will monitor network traffic and analyze it against a rule set defined by the user. The program will then perform a specific action based on what has been identified.

Snort Installation Under FreeBSD 8.x

Snort installation on a  pfSense box begins with  SSHing into the system to access the shell prompt. If you have a recent version of pfSense (2.0 or newer), it should be running under FreeBSD 8.1 or newer. You will need to install the following package via pkg_add: gcc version 4.2.x (including libraries), zlib (1.2.3), libpcap (1.0.0 including libpcap-devel), pcre (8.32), bison (2.7), m4 (1.4.16), flex (2.5.4 including flex-devel), libdnet (1.11 including libdnet-devel), and tcpdump (4.0.0). Versions of these package can be newer than what is listed here. Then download the source code for snort at the official snort website. Download the archive to /usr/local/src. Type the following commands to unpack snort:

cd /usr/local/src
tar -zxvfsnort-2.9.5.5.tar.gz

Once you have unpacked snort, do the following to compile snort:

cd /usr/local/src/snort-2.9.5.5
./configure -enable-sourcefire
make
make install

Note any errors which may cause the “configure” step to abort and also check the file “config.log” which is generated from the “configure” line above.

In order to download snort rules from www.snort.org, you must be a registered user or have a paid subscription to download rules sets or VRT rules. Registered users will be able to download rule sets which are approximately one month behind what is available to paid subscription holders.

Continue snort installation by issuing the commands below to copy the configuration files to /etc/snort:

cd /etc
mkdir -p snort
cd snort
cp /usr/local/src/snort-2.9.5.5/etc/*.
tar -zvxf snortrules-snapshot-.tar.gz
touch /etc/snort/rules/white_list.rules /etc/snort/rules/black_list.rules

This will place the configuration files from the snort 2.9.5.5 unpack and the rules snapshot under the /etc/snort directory. If the rules snapshot file is newer, this is not an issue (since rules are updated on a periodic basis by the snort team). Also, the configuration files are residing in /etc/snort and the rules files will be in /etc/snort/rules and the so_and preprocessor rules will be located in /etc/snort.

In the next article, we will continue our look at snort installation under pfSense.

External Links:

The official snort web site

Ad Links:

The post Snort Installation in pfSense: Part One appeared first on pfSense Setup HQ.

Snort Installation in pfSense: Part Two

$
0
0

snort installationIn part one of this series, we began our look at snort installation. In this article, we continue the process.

Next, add a directory to /usr/local/lib:

cd /usr/local/lib
mkdir snort_dynamicrules

Add the following line to file /etc/passwd (or use the “useradd” or “adduser” command):

snort:*:40000:snort

Issue the commands below in order to take ownership of all files in /etc/snort:

cd /etc/snort
chown -R snort:snort *

Locate and modify the following variables in your snort.conf file (in directory /etc/snort) as follows (found between lines 40 and 120 in snort.conf):

This assumes the network you are going to monitor is 192.168.1.0/24:

var RULE_PATH /etc/snort/rules
ipvar HOME_NET 192.168.1.0/24
ipvar EXTERNAL_NET !$HOME_NET
var SO_RULE_PATH /etc/snort/so_rules
var PREPROC_RULE_PATH /etc/snort/preproc_rules
var WHITE_LIST_PATH /etc/snort/rules
var BLACK_LIST_PATH /etc/snort/rules

You will also need an initialization script. You can find one for FreeBSD 8.x at the official snort website. Place this script into the /etc/rc.d directory on your pfSense box.

You also want to make a symbolic link (symlink) in /usr/sbin to point to where the actual snort binary was compiled. You could also copy the snort binary to /usr/sbin as well. To make the symlink, issue these commands:

cd /usr/sbin
ln -s /usr/local/bin/snort snort
chmod 700 snort

If the directory “/var/log/snort” does not exist on your system, issue the following commands as “root”:

cd /var/log
mkdir snort
chmod 700 snort
chown -R snort:snort snort

The commands below will also change the ownership of the directories and files to user “snort” and group “snort:

cd /usr/local/lib
chown -R snort:snort snort*
chown -R snort:snort snort_dynamic*
chown -R snort:snort pkgconfig
chown -R 700 snort*
chown -R 700 pkgconfig
cd /etc
chown -r snort:snort snort
chmod -R 700 snort


style="display:inline-block;width:728px;height:90px"
data-ad-client="ca-pub-8834983181171783"
data-ad-slot="8926342897">

Testing Your Snort Installation

At this point, you should be ready to do some testing of snort to see if it actually starts up and reads in the rules. You can check /var/log/messages to catch any fatal errors or crashes.

If you want to test snort startup, issue the following commands:

cd /usr/local/bin
./snort -T -i em0 -u snort -g snort -c /etc/snort/snort.conf

The above command will cause snort to start up in self-test mode, checking all the supplied command line switches and rules files that are passed to it and indicating that everything is ready to proceed. If all the tests are passed, you should see the following:

Snort successfully validated the configuration!
Snort exiting

If no errors are returned, you can proceed. To manually start snort, issue the following commands:

cd /usr/local/bin
 ./snort -i em0 -D -u snort -g snort -c /etc/snort/snort.conf

Make sure that snort initializes properly before proceeding below, you can check /var/log/messages for more information in the event of an error in initialization.

To see if snort is actually running on the system, you can check which processes are running, like so:

ps aux | grep -i “snort”

If snort is working, it should return output that indicates snort is a running process, like so:

19633 ?? Ss 0:00:04 /usr/local/bin/snort -D -i em0 -u snort -g snort -c /etc/snort/snort/conf -l /var/log/snort/


style="display:inline-block;width:180px;height:90px"
data-ad-client="ca-pub-8834983181171783"
data-ad-slot="8138242896">

External Links:

The official snort website


The post Snort Installation in pfSense: Part Two appeared first on pfSense Setup HQ.

Snort Security Optimization

$
0
0

snort securityIn the previous two articles (part one part two), I discussed the installation of snort. In this article, I will mention some ways to improve snort security.

Improving Snort Security

One of the snort security issues is preventing unauthorized access to a privileged account. There are several ways of preventing this. First, when running snort in daemon (-D) mode, the user (-u) and group (-g) switches should be used. This will allow snort to run as a given user and group after it is initialized. Typically, most system administrators prefer to add the snort user and group to their systems, and that the snort user should be unable to login or initiate shell privileges.


style="display:inline-block;width:180px;height:90px"
data-ad-client="ca-pub-8834983181171783"
data-ad-slot="8138242896">

Second, the source code for snort/DAQ binaries, logging directories, shared/static libraries, and configuration files should all be owned by the snort user with appropriate permissions. Finally, all binaries which are produced by the compiling and installation process of snort and DAQ should be verified using a hash function and the output stored on removable media. A cron job could be used to run this process on a regular basis with results e-mailed to a system administrator. Another alternative would be the use of a utility called tripwire for auditing installed software on a computer. All of these measures are excellent ways of increasing snort security.


style="display:inline-block;width:728px;height:90px"
data-ad-client="ca-pub-8834983181171783"
data-ad-slot="8926342897">

Mirroring or Copying Network Traffic to Snort

In addition, your small office/home office (SOHO) router can be used to mirror or copy network traffic to a snort sensor running on a standalone system or to a virtual machine running in VirtualBox, VMWare, or Xen. This method of improving snort security can be easily done provided you have a router that is running DD-WRT, OpenWRT, or Tomato as the firmware. If you are running Tomato, you may have to add the following to your startup script:

modprobe ipt ROUTE

Users of OpenWRT must use the Tee option for IPtable (provided by module iptables-mod-tee). The module “iptabels-mod-tee” must be loaded before the following command will work:

iptables -t mangle-A PREROUTING -j TEE -gateway x.x.x.x

Where x.x.x.x is an IP address you wish to mirror traffic to (usually a system running snort). It should be noted that in more recent versions of OpenWRT (10.03.1 and never), iptables-mod-tee does not seem to be enabled by default, and using it will require a rebuild/re-enabling of modules for OpenWRT.

Now, using DD-WRT or Tomato’s GUI (or SSHing into the router), issue the following commands:

iptables -A PREROUTING -t mangle -j ROUTE -gw x.x.x.x -tee

iptables -A POSTROUTING -t mangle -j ROUTE -gw x.x.x.x -tee

In each case, x.x.x.x is the address of the machine running snort. To stop mirroring traffic, type

iptables -F -t mangle

If you have snort running in test mode (-T option), try starting snort with /etc/rc.d/snort start (you should get a running message if snort is running properly). If there is a problem, check the output in /var/log/messages. Also, you can check the status of snort by issuing this command:

./snort status

External Links:

How to make some home routers mirror traffic to Snort at www.snort.org

DD-WRT

OpenWRT

Tomato

The post Snort Security Optimization appeared first on pfSense Setup HQ.

Open Source Software: Costs and Benefits

$
0
0

Some of those accessing this blog are undoubtedly considering deploying pfSense on their home network, or perhaps in a small office/home office (SOHO) environment. For that reason, I thought it might be useful to devote an article to the costs and benefits of using free and open source software (FOSS) versus commercial software and hardware when deploying a firewall/router.

Open Source Software: Factors to Consider

open source software

The Linksys WRT54G, an example of a consumer grade router.

The most obvious factor to consider is the monetary cost. Initially, this would seem to weigh heavily in favor of pfSense and other free firewall software. For $20 to $50, however, you can purchase a small Linksys, Netgear or Asus router, which uses almost no power and supports port forwarding, performs Network Address Translation (NAT), acts as a Dynamic Host Configuration Protocol (DHCP) server, and provides stateful packet filters. If you use Linux and netfilter, or for that matter m0n0wall or pfsense, even if you have an old PC on which to run the software, it will cost you at least a few dollars a month in electricity. Unless you are familiar with the software you are using, you will find it more difficult to configure than one of the cheap consumer-grade routers, so there is an additional investment of time. If you are setting it up for a small business, it will cost more to pay for the employee’s time to set up a Linux or pfSense firewall than the Linksys would cost to buy. If all you require is a router/firewall than can do port forwarding and DHCP, then there are readily available commercial solutions that are affordable.

If you require additional functionality, however, the situation may change. Commercial VPN solutions can be staggeringly expensive. Yet free solutions such as pfSense and m0n0wall will also work. Even taking into account the fact that the free solutions may not have the same features and capabilities of the commercial version, if you need to implement a virtual private network and there is open source software that meets your requirements, then you can achieve substantial savings.

There are additional factors, some of which are related to cost. For example, support: what does it cost, is it available, and how timely is the support? Moreover, what format does support take: phone, e-mail, online forums, service calls, and so on?

open source software

If installing and configuring netfilter, pfSense or another open source solution doesn’t sound intimidating, an old PC may be suitable.

Time is another factor, and this can cut both for and against open source software. Take the case where a business is considering entering into a partnership with another company. This other company is concerned because the partnership requires sending sensitive data, and the business only has a consumer-grade firewall. The IT department could recommend the purchase of an enterprise-level firewall. This will require contacting vendors, getting quotes, passing a quote on to a manager for approval, and then submitting a purchasing order to the accounting department. Or the IT department can just find an old PC, load Linux and netfilter onto it (or m0n0wall or pfSense or IPCop or any one of a number of open source software solutions), and be done with it, especially if time is of the essence. On the other hand, if your IT department is not familiar with Linux or BSD, deploying an open source solution may actually cost you time, so you would be better off seeking a commercial product.

Another related factor is performance. Speed, efficiency, and reliability are important indices of performance. A fast solution that crashes all the time isn’t very useful. Conversely, a reliable software package that runs slowly may not be the best option.

Usability is another factor, and it relates to cost. If the learning curve is very high, then your training costs will rise. You may want to consider whether a product is customizable if it does not do exactly what you want it to do.

It is often important to consider how well-established the product is. The more well-established the software is, the more likely its creators will be around in the future. A larger and more well-established project will also likely have better community support and reliability. You do not want to invest a lot of time into a product that is likely to go away. In this regard, open source software does well. The netfilter project started in 1998; m0n0wall has been around since 2004, and PF, the packet filtering software on top of which pfSense is built, has been part of OpenBSD since 2001.

Even a security product like a firewall involves security implications, which should be an important factor in your choice. Is the product secure, and will it be handling secure data? You want to consider whether it will be opening any security risks, as well as what type of auditing and logging it can produce.

Finally, you will want to review the license agreement closely. Often the free software is not free if you are a business, or there are special restrictions on the number of installations or other criteria. If your company has a legal department or if you have legal counsel, it might not be a bad idea to have them review the license agreement.

Conclusion

It may just be my bias as the owner of a blog devoted to a particular piece of open source software, but I am inclined to think that in many if not most circumstances, you will find open source software to be the more cost-effective and efficient solution. At one end of the spectrum, commercial consumer-grade routers provide a lot of functionality at a low price. At the other end of the spectrum, enterprise-level firewalls often provide a greater level of management control and logging capabilities, which a mid-sized or large company may require. These capabilities often justify the higher cost. But for those who fall in between these two extremes, often open source software provides the better alternative.

External Links:

The True Cost of Open Source – web site devoted to explaining how you can cut development costs and improve performance with open source software.

Open Source Applications: Benefits and Risks at www.networksolutions.com

10 Reasons Open Source Is Good for Business at www.pcworld.com

The post Open Source Software: Costs and Benefits appeared first on pfSense Setup HQ.

Viewing all 260 articles
Browse latest View live